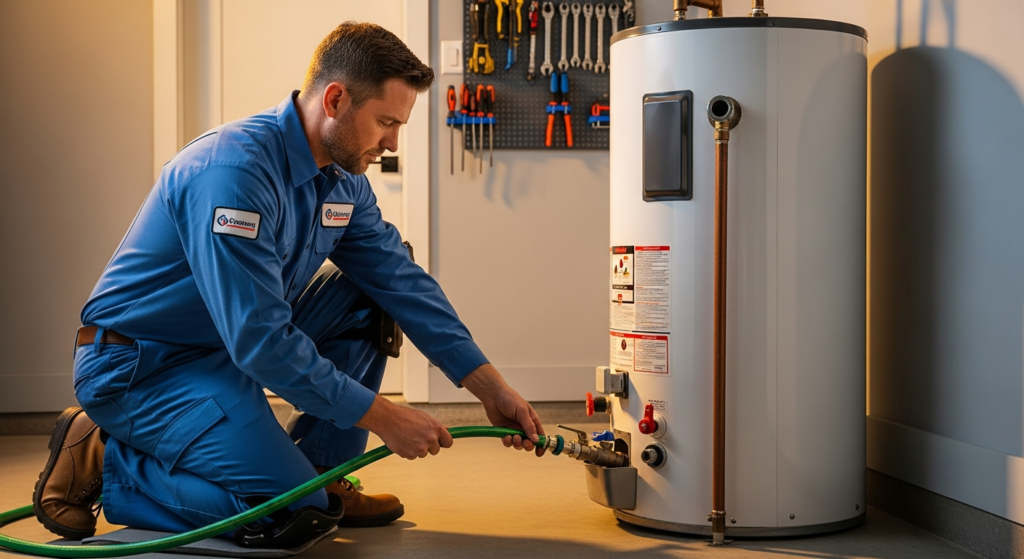




Flushing your water heater is one of the most important maintenance tasks you can do as a homeowner. Over time, sediment, minerals, and debris accumulate at the bottom of your tank, reducing efficiency, driving up energy bills, and shortening the lifespan of your unit. In serious cases, sediment buildup is one of the top reasons homeowners experience no hot water. Learning how to flush a water heater can save you hundreds of dollars in repairs and keep your hot water flowing reliably for years. For professional assistance, contact our water heater replacement team.
In this guide, we walk you through the complete process step by step, covering both traditional tank and tankless water heaters, so you can tackle this essential maintenance task with confidence.
Signs Your Water Heater Needs Flushing
Not sure if it’s time to flush your water heater? Watch for these warning signs:
- Rumbling or popping sounds — Sediment buildup at the bottom of the tank traps water beneath it. As the burner heats the water, it creates steam bubbles that pop through the sediment layer, producing those unsettling noises.
- Discolored or rusty hot water — If your hot water runs brown, yellow, or cloudy while cold water stays clear, sediment is likely contaminating your supply.
- Reduced hot water supply — Sediment displaces water volume in your tank. If showers are running cold faster than usual, buildup is a likely culprit. For more troubleshooting tips, see our guide on what to do when your water heater is not working.
- Longer heating times — A thick layer of sediment insulates the water from the heating element, forcing your unit to work harder and longer.
- Higher energy bills — Reduced efficiency translates directly to increased utility costs.
If you notice any of these symptoms, it’s time to drain and flush your water heater.
Safety Precautions Before You Start
Water heaters operate at high temperatures and may involve gas or high-voltage electricity. Follow these safety precautions before you begin:
- Turn off the power source. For gas water heaters, turn the gas valve to the “pilot” or “off” position. For electric units, switch off the dedicated breaker at your electrical panel.
- Allow the water to cool. Water inside the tank can exceed 120°F. Wait at least one to two hours after shutting off the heater, or run a hot water faucet for several minutes to bring the temperature down.
- Wear protective gloves. Even after cooling, the water may still be warm enough to cause discomfort.
- Work in a well-ventilated area. If your water heater is in a confined space, ensure adequate airflow, especially with gas models.
- Know where your main water shut-off valve is. In case of an unexpected water heater leak, you need to be able to stop the water supply quickly.
Tools and Materials You’ll Need
Gather these items before starting:
- Standard garden hose (long enough to reach a floor drain, driveway, or bucket)
- Flat-head screwdriver (for some drain valve types)
- Work gloves
- Bucket (5-gallon recommended)
- Towels or rags for drips
- Safety glasses (optional but recommended)
How to Flush a Water Heater: Step-by-Step
Follow these steps to safely and thoroughly drain your water heater and remove accumulated sediment.
Step 1: Turn Off the Water Heater
Gas units: Locate the gas control valve on the front of the unit and turn it to “off” or “pilot.” Do not skip this step; heating an empty or partially empty tank can damage the unit or create a safety hazard.
Electric units: Go to your electrical panel and flip the breaker labeled for your water heater to the “off” position. Verify the unit is no longer heating.
Step 2: Turn Off the Cold Water Supply
Find the cold water inlet valve at the top of your water heater and turn it to the closed position. This prevents new water from entering the tank while you drain it.
Step 3: Connect a Garden Hose to the Drain Valve
Locate the drain valve near the bottom of the tank. It looks like a standard hose bib or spigot. Connect a garden hose securely and run the other end to a safe drainage location, such as a floor drain, your driveway, or a large bucket.
Important: Make sure the drainage point is lower than the drain valve, or the water will not flow. If draining uphill is unavoidable, you may need a small utility pump.
Step 4: Open a Hot Water Faucet
Open a hot water faucet at a sink or bathtub nearest to the water heater. This relieves pressure in the system and allows the tank to drain more quickly by breaking the vacuum.
Step 5: Open the Drain Valve and Drain the Tank
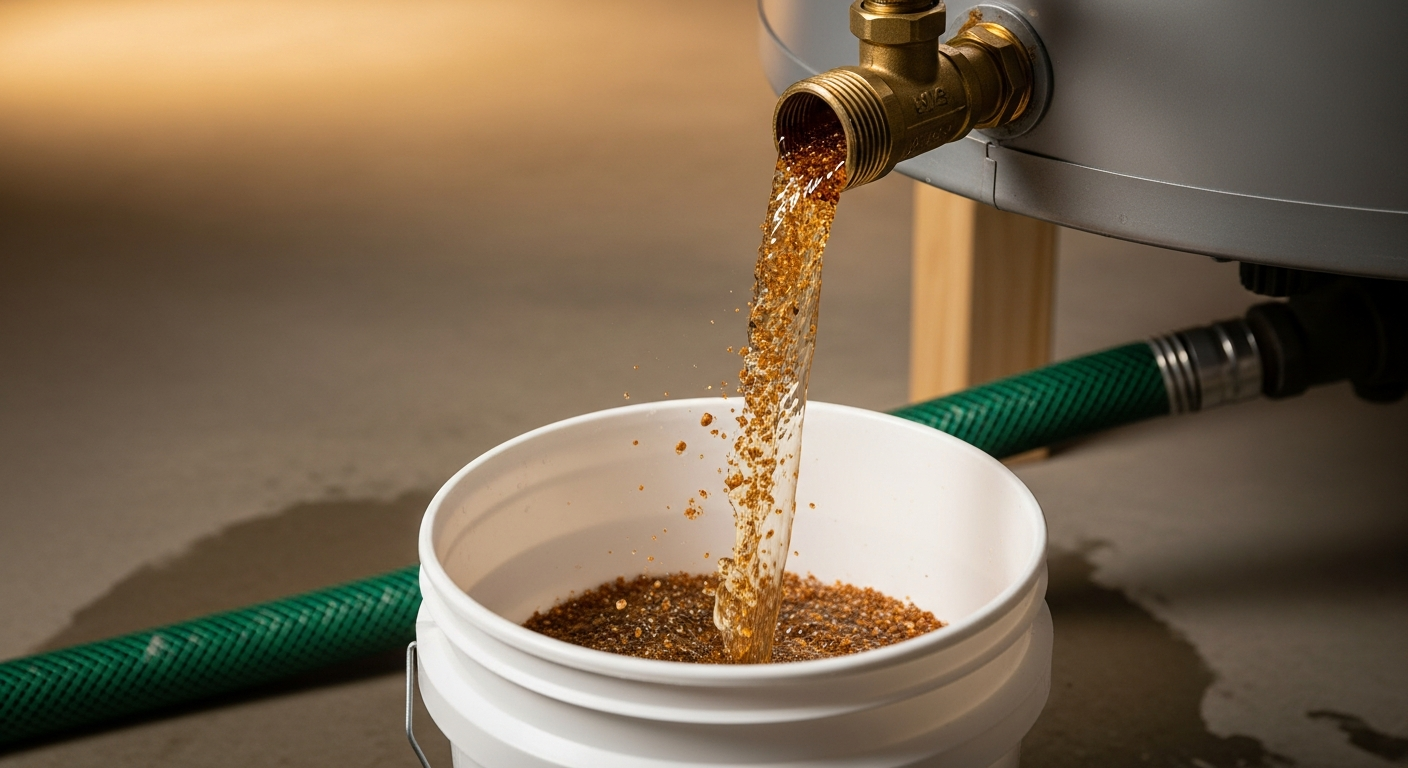
Open the drain valve by turning it counterclockwise. Water will begin flowing through the hose. The first several gallons will likely appear discolored with visible sediment — this is normal and exactly what you are trying to remove.
Allow the tank to drain completely. This typically takes 20 to 45 minutes depending on tank size and sediment levels.
Step 6: Flush the Tank With Fresh Water
With the drain valve still open, briefly turn the cold water supply back on. This sends a burst of fresh water through the tank, stirring up and flushing out remaining sediment. Let the water run through until it flows clear — usually two to three minutes.
Repeat this flush-and-drain cycle two to three times or until the water coming out of the hose is consistently clear.
Step 7: Close the Drain Valve and Refill the Tank
Once the water runs clear:
- Close the drain valve securely.
- Disconnect the garden hose.
- Turn the cold water supply fully back on.
- Leave the hot water faucet open (from Step 4) until water flows steadily with no air sputtering — this means the tank is full.
- Close the hot water faucet.
Step 8: Restore Power and Verify
Gas units: Turn the gas valve back to the “on” position and relight the pilot if needed, following the manufacturer’s instructions on the unit’s label.
Electric units: Flip the breaker back on. Never restore power to an electric water heater before the tank is completely full — running a dry heating element will burn it out immediately.
Wait 30 to 60 minutes, then check a hot water faucet to confirm the unit is heating properly.
How to Flush a Tankless Water Heater
Tankless water heaters don’t have large tanks, but they still accumulate mineral scale inside their heat exchangers. The flushing process is different and requires a few extra supplies:
- Submersible pump (small recirculation pump)
- Two 3/4-inch hoses
- 5-gallon bucket
- White vinegar (4 to 5 gallons, food-grade)
Tankless Flushing Steps
- Turn off the power (gas or electric) and close the hot and cold water isolation valves on the unit.
- Connect one hose from the cold water service port to the pump in the bucket. Connect the second hose from the hot water service port back into the bucket.
- Fill the bucket with white vinegar.
- Turn on the pump and circulate the vinegar through the heat exchanger for 45 to 60 minutes.
- Turn off the pump, drain the vinegar, and flush with fresh water for a few minutes.
- Close the service ports, reopen the isolation valves, and restore power.
For a deeper comparison of tank versus tankless systems, check out our article on tankless vs. tank water heaters.
How Often Should You Flush Your Water Heater?
Most plumbing professionals recommend flushing your water heater at least once per year. However, you may need to flush more frequently in these situations:
- Hard water areas — Southern California, including Orange County and the Inland Empire, has notoriously hard water. Homes in these regions should consider flushing every 6 months.
- Heavy household usage — Larger families that use more hot water generate sediment faster.
- Older water heaters — Units over 5 years old that have never been flushed may need multiple flush cycles to clear accumulated buildup.
For comprehensive tips on keeping your system in top shape, visit our water heater maintenance guide.
When to Call a Professional
While flushing a water heater is a manageable DIY task for many homeowners, certain situations call for professional help:
- The drain valve is stuck or corroded. Forcing a seized valve can break it, causing a flood.
- The water remains discolored after multiple flushes. This could indicate internal tank corrosion, a failing anode rod, or other issues requiring inspection.
- You notice leaking around the tank, valves, or fittings. Leaks can escalate quickly — learn more in our water heater leaking guide.
- The water heater doesn’t reheat after flushing. A malfunctioning thermostat, heating element, or gas valve may need professional diagnosis.
- You’re uncomfortable working with gas lines or electrical connections. Safety always comes first.
At 911 Drain Lines and Plumbing, our licensed technicians handle water heater maintenance, flushing, and repairs throughout Orange County and the Inland Empire. We offer 24/7 emergency service so you’re never stuck without hot water. Contact us today to schedule your water heater service.
Frequently Asked Questions
How long does it take to flush a water heater?
Plan for about one to two hours total, including cooling time, draining (20 to 45 minutes), flushing, and refilling. The actual active work is only about 30 minutes.
Can flushing a water heater fix rumbling noises?
Yes. Rumbling and popping sounds are usually caused by sediment at the bottom of the tank. Flushing removes this buildup and often eliminates the noise entirely.
Is it safe to flush an old water heater that has never been drained?
Proceed with caution. On very old units that have never been flushed, the drain valve may be clogged with sediment or the valve itself may be corroded. If the valve won’t open or the water doesn’t flow, call a professional plumber rather than forcing it.
Do tankless water heaters need to be flushed?
Yes. Tankless units accumulate mineral scale inside the heat exchanger, which reduces efficiency and can cause error codes. Most manufacturers recommend descaling every 12 months, or every 6 months in hard water areas like Orange County.
What happens if you never flush your water heater?
Sediment continues to build, reducing heating efficiency, increasing energy costs, causing premature tank corrosion, and eventually leading to complete unit failure. A water heater that is never flushed may last only 6 to 8 years instead of the typical 10 to 15 years.